


Background
Clients that are in HMIS must be in a project, ideally every client in HMIS must have been enrolled in a project at some point. Please follow the steps below to learn how to enroll clients into a project.
Enrolling Clients into a Project
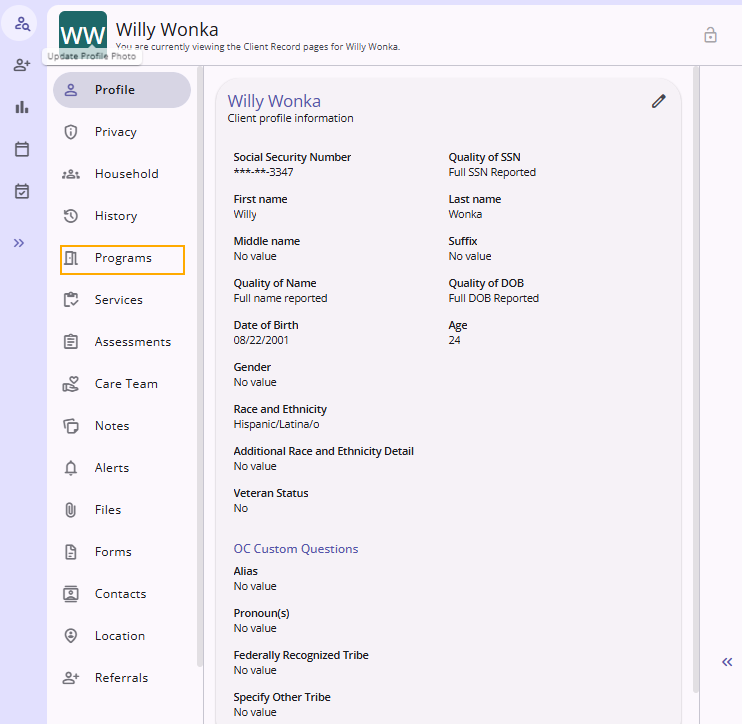
Search for the client, click on the appropriate record to access the client's profile. Once the client's profile, select Programs from the left panel, Client Navigation Menu.
On the Programs screen, you will see the client's enrollment history, including any active and previous program enrollments.
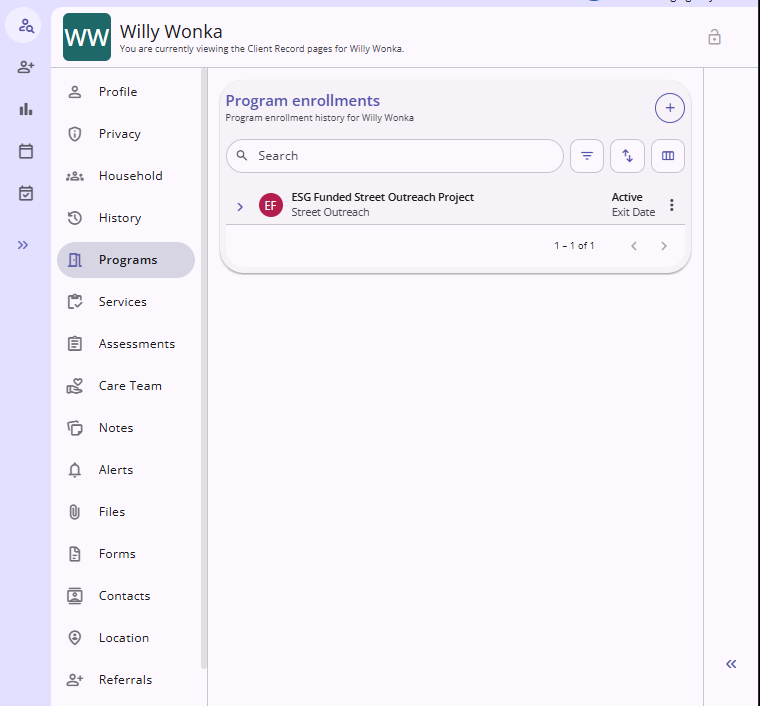
Each enrollment displays the Program Name, Entry Date, and Status. If the client has exited the program, an Exit Date will be displayed. If the client is currently enrolled, the enrollment will display as Active.
The following program information is shown in the Programs Available Section:
- Program Name – The HMIS project the client will be enrolled in.
- Program Description – A brief description of the selected program, if one has been configured by the agency.
- Funding Source – The funding source(s) associated with the selected program, when applicable.
- Services Categories - Services set up for this program.
The following program information will be shown once a program is selected for the client to be enrolled in:
- Enrollment Date – The date the client entered the program.
- Required Data Elements – Displays the HUD and program specific fields that must be completed before saving the enrollment.
- Save – Select Save to create the enrollment after all required information has been entered.
Users will then have the option to add additional household members if the members were added to the Global Household prior to starting a Program Enrollment:
- Household Members – Displays members of the client's household, allowing you to include eligible household members in the enrollment if applicable.
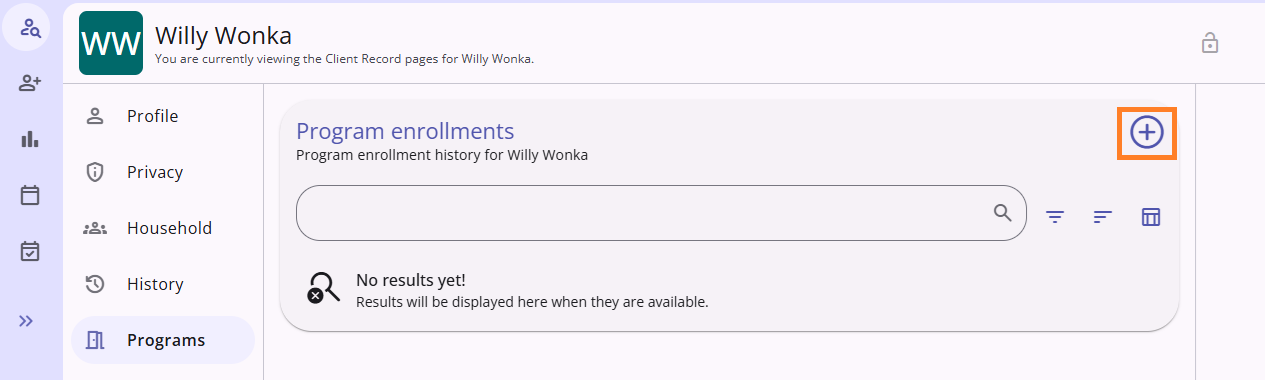
To enroll a client into a new program, select the Add icon (+). A list of programs available to your agency will be displayed. After selecting the appropriate program, Clarity will guide you through the required enrollment steps based on the selected project type.
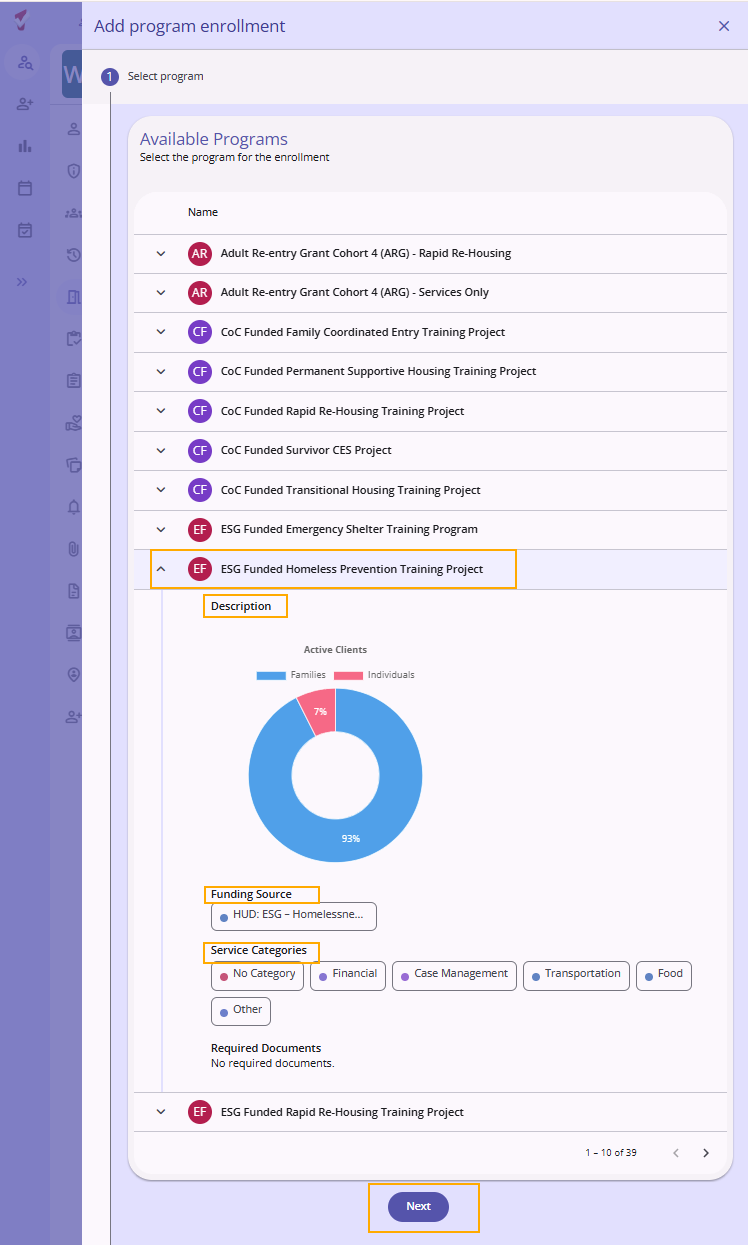
After selecting a program, you will be guided through the add program enrollment workflow. Depending on the project type, you may be prompted to complete one or more required steps before the enrollment is created.
For Street Outreach projects, the first required step is Record Current Living Situation.
Complete the required fields, including:
- Date of Contact
- Current Living Situation
- Location Details (if applicable)
After entering the required information, click Next to continue to the next step.
Program Enrollment Sections
You will then be taken to the Program Entry screen, where you will complete the HUD required and program specific data elements needed to enroll the client.
After all required fields have been completed, click Save to complete the enrollment.
These are the screens that will follow the Enroll button for each client. The screen structure goes as follows:
- Program Enrollment
- Relation to Head of Household (when applicable)
- Prior Living Situation
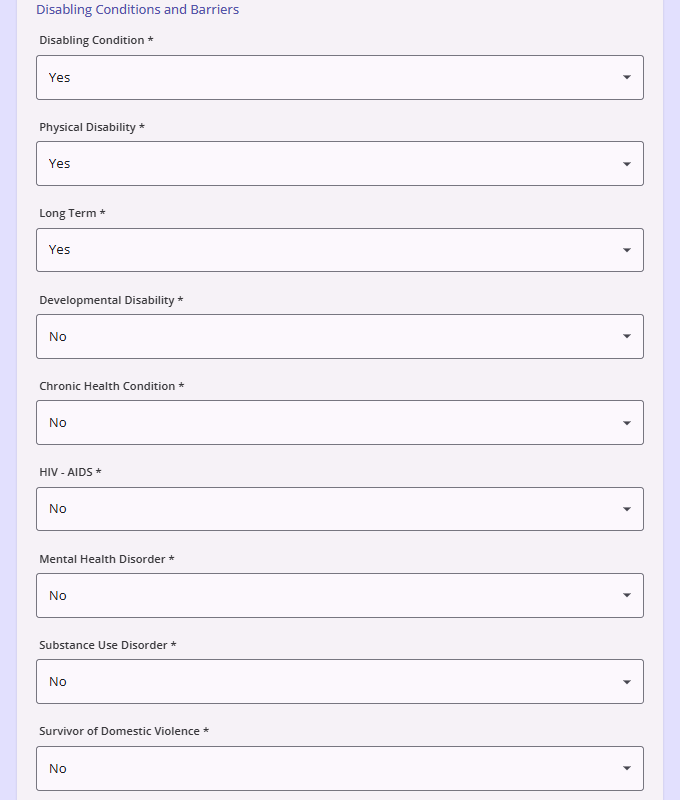
- Disability Condition
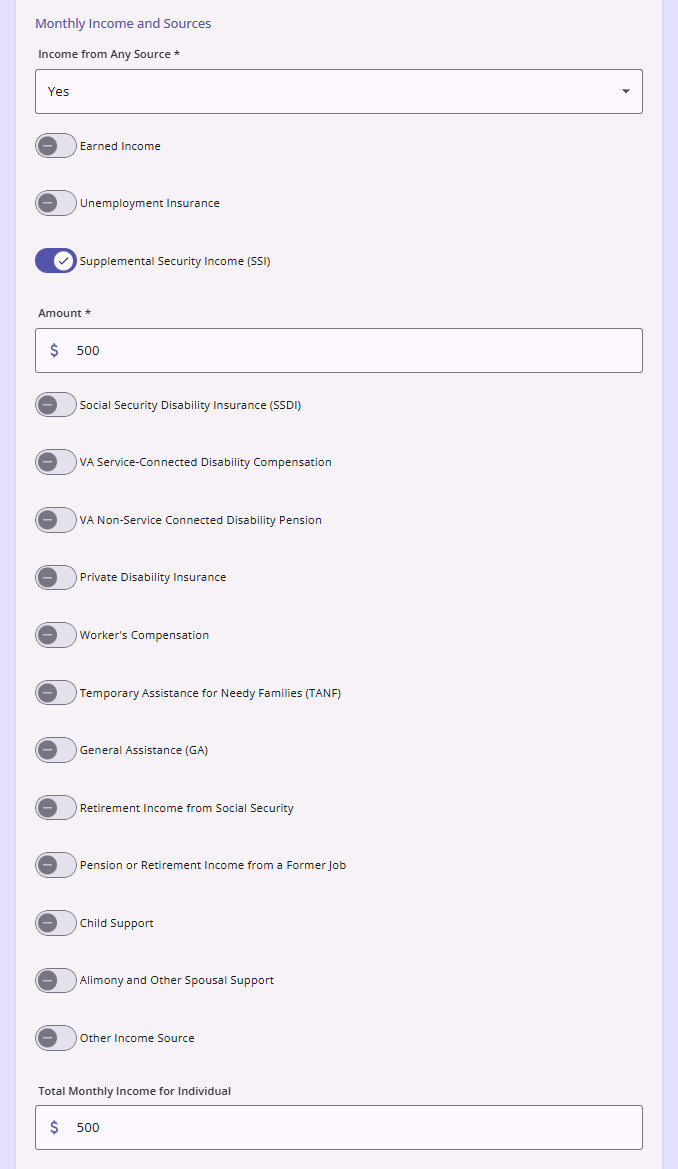
- Cash Income
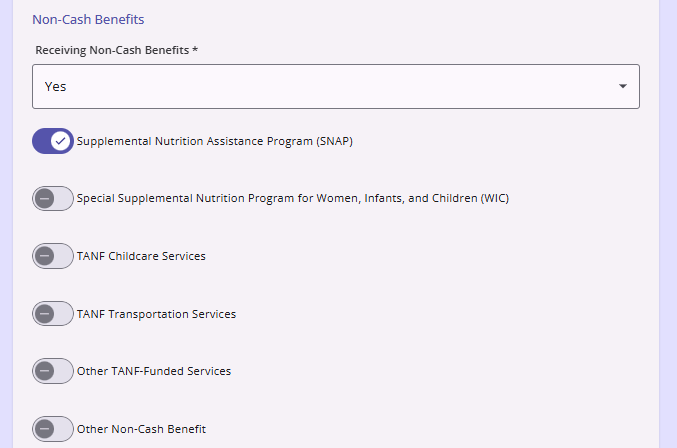
- Non-Cash Benefit
- Health Insurance
- Data Element 4.21 Sex
- OC Custom Fields
- Agency Custom Fields (if applicable)
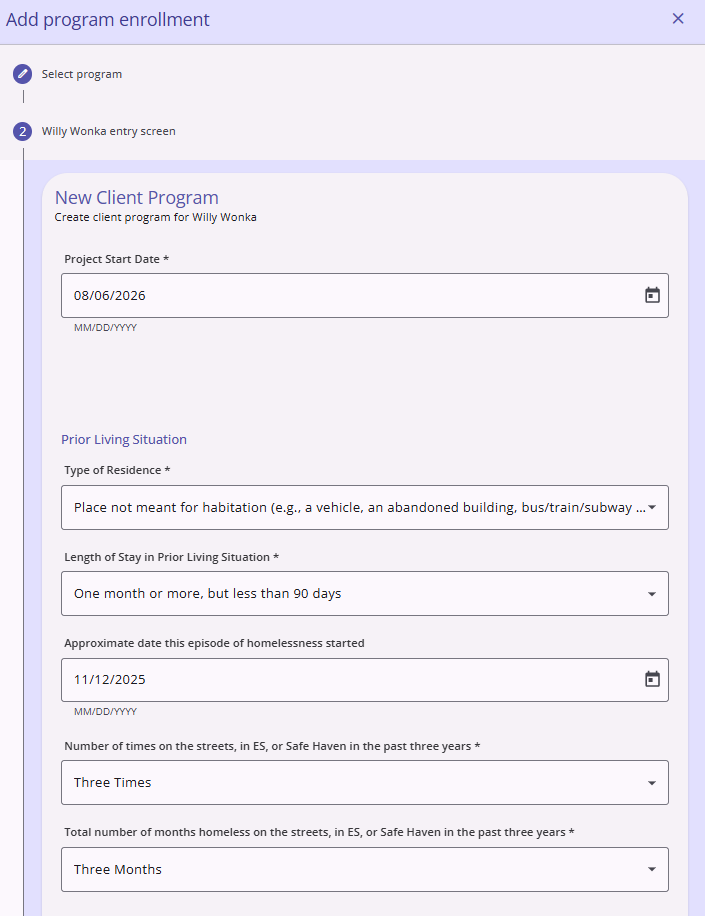
Next is Disabling Condition information. If you select Yes to any disabling condition question the Long Term question will appear next to it.
Next is the client's Cash Income information. If you select Yes for Income from Any Source the list of Cash Income sources will appear. Click the switch next to any Cash Income source that the client receives and enter the dollar amount that the client receives monthly from that income source.
Next is the client's Non-Cash Benefits information. If you select Yes for Non-Cash Benefits the list of Non-Cash Benefit sources will appear. Click the switch next to any Non-Cash Benefit source that the client receives.
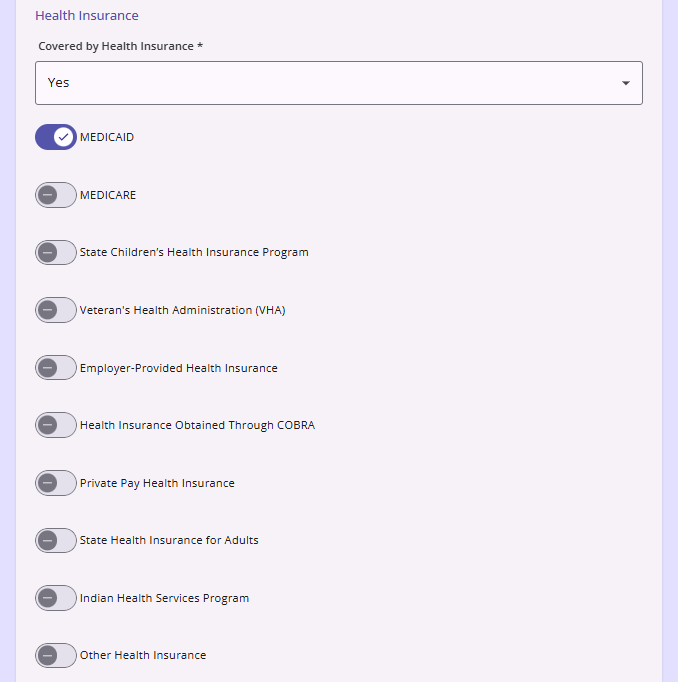
Next is the client's Health Insurance information. If you select Yes for Health Insurance the list of Health Insurance sources will appear.Click the switch next to any Health Insurance source that the client receives.
Now click Save if you are enrolling an individual or Save & Next if you are enrolling a family. If you are enrolling an individual, you are done! If you are enrolling a family, complete this process for each additional household member and click Save.

